 |
Connect with Kurt:    |
|
Grandma’s Green Beans
A Farm to Table Story
I was lucky to grow up with an appreciation for fresh produce from farms and gardens. My grandparents in St Louis, Missouri taught me much about where food comes from. My grandfather, even though full-time employed with the St Louis Water Division, kept a garden in the back yard where I was introduced to veggie gardening. He grew a few tomatoes, okra, and string beans, but later on in life a friend of his gave him about a quarter of an acre on the edge of a large cornfield to grow a real vegetable garden.
In this large garden he grew tons of tomatoes, green beans, bell peppers, squash, okra, and corn. The summer of 1970 found me banished from my home and sent to Cleveland then St Louis where my parents thought my relatives would straighten my rebel fifteen year old self out. In St Louis I helped grandpa with the garden and would help grandma can green beans for their winter supply. She also canned corn, okra and tomatoes. I learned a lot from them that summer such as, four vegetable dishes on the supper table was just about the right amount, and that a troublesome fifteen year old can just about go through a wooden fence when tossed by a pissed off Grandpa. I also learned that leftover green beans or okra was just as good as the day before.

This was the real deal Farm-to-Table existence long before the current movement took hold. They didn’t know any other way as both of them grew up on farms. Yes they could have bought many of their vegetables from grocery stores back then but I think they knew the best flavor was to be found in veggies they knew the source from which they came. These were tomatoes with a rich sweet taste that smacked of the ground they grew in. That wonderful dark, almost fluffy soil made for some of the best vegetables I have ever tasted. The hot humid climate was perfect for the veggies grandpa chose to grow there, especially the tomatoes.
Twice a week during my extended stay in St Louis grandpa and I would go to the farm to weed, and harvest the crops. It was there that I truly learned what a good tomato tastes like. It would be a typical 90° day with high humidity and grandpa would call me over to the tomato patch he was working on. Then he would take out his razor sharp pocket knife and cut two large ripe tomatoes from the vine. In his other pocket he brought a salt shaker and after the red orb was cut in half would sprinkle his tomato with salt and eat it right on the spot with juice running down his chin. I would follow his lead and it was on that spot I learned that this was what a tomato was supposed to taste like. During tomato season almost every meal was supplemented by a plate of sliced tomatoes. Now that’s good eating!
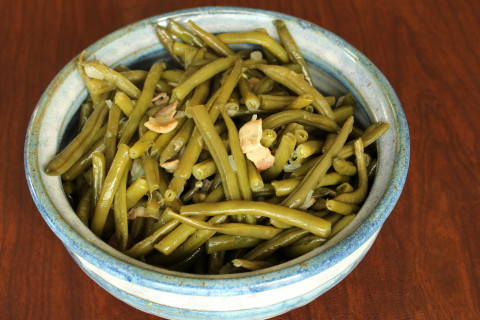
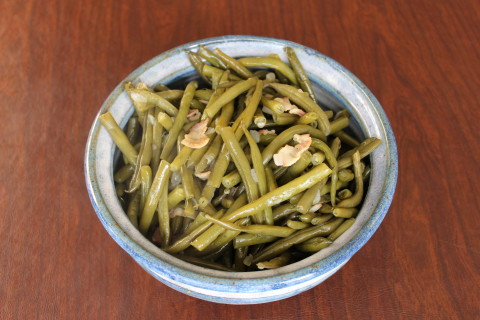
Grandma served her special Grandma’s Green Beans recipe at least once per week and I never tired of it, but I did tire of cutting green beans. She would cook bacon, onion and green beans that would be at home in any Farm-to-Table restaurant. There were no herbs needed to flavor this heirloom veggie dish. The flavor was carried by the top quality green beans, onions and bacon. It was a memorable trip to St Louis that I have strong memories from, mostly good ones.
Try this recipe yourself and see if you agree it is one of the best veggie dishes ever. Just be sure and make the whole batch because the leftovers are good for 2-3 days after and heat up in a jiffy. If you can’t get good fresh green beans frozen will do, but use the best Applewood bacon you can get your hands on.
Here’s to good healthy eating. Enjoy!
Grandma’s Green Beans
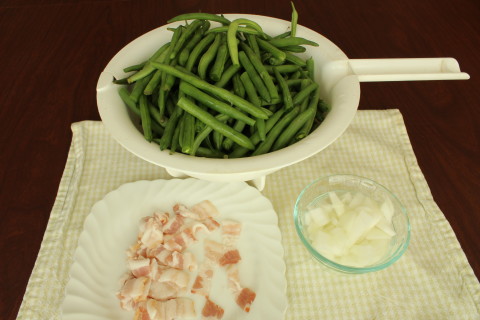
1 pound fresh or frozen green beans
½ cup yellow onion, chopped
2 slices of bacon cut into ½ inch pieces
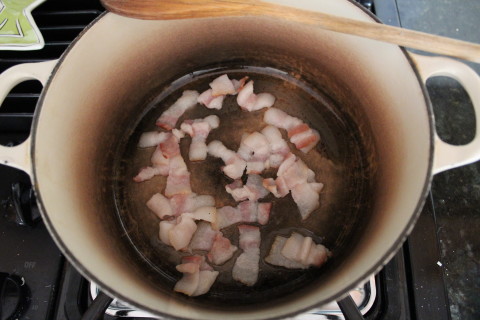
½ teaspoon oil
If using fresh green beans wash and then trim the stem end off. Cut to about four inch lengths for easier stirring in the pot.
In a 3 ½ quart to 4 ½ Le Cruset™ or similar heavy type of cooking pot with lid add oil and bacon cooking on medium heat for 3 minutes stirring every 30 seconds or so.
Add onions and cook on medium low heat stirring often for 5 minutes.
Drain the oil and bacon grease and add green beans plus a quarter cup of water and continue cooking without stirring for 5 minutes covered on medium low.
Stir and continue cooking on medium low heat covered for five minutes covered.*
At this point you can let it cook for another 10 minutes before uncovering, adding salt and fresh ground pepper to taste and stirring. If it is dry on the bottom of the pot add a bit more water-2 tablespoons should do.
Now the beans have been cooking for 20 minutes and are either close or will need about 10 more minutes depending on the size and tenderness of the beans. Taste one to see if it needs more cooking time, or seasoning.
Serves 4-6
Note:
It’s okay if the beans come to the top of the pot as in 10-15 minutes they will shrink considerably.
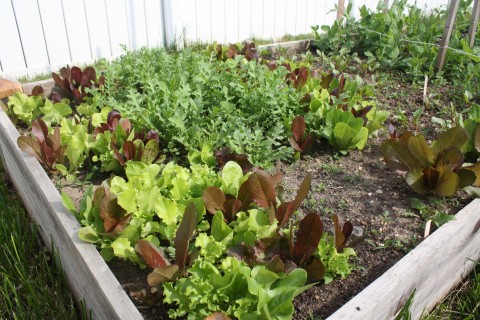
Spring Greens and a Great Salad Dressing Recipe
In many ways I’m new to vegetable gardening. Sure I helped my room mate in Alaska with his garden for a couple of years, and I grew vegies in the backyard where I grew up in Colorado. That was all just dabbling in gardening compared to what I’m growing over these last three years. I don’t just grow many types of vegetables in my garden, I preserve and can them, develope new recipes based on them and write about it the experience too.
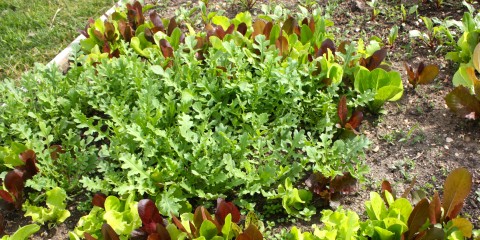
My first arugula crop
Rocky Top Blend from Baker Creek Heirloom Seeds
The Mission of the American Community Gardening Association is to build community by increasing and enhancing community gardening and greening across the United States and Canada.
and it’s cool that they connect people through gardening. What a great way to meet people in your community through growing something healthy to eat. In a day and age when people are getting more and more detached from this amazing planet that gives us so much it’s important to get your hands dirty and grow something with yourself to enjoy at your table. It’s also a great opportunity to teach children seasonal cycles known to all just a few short generations ago when you didn’t get asparagus, or peaches year round. Many kids love to help in the garden, even in this day and age of video game addiction.
If you want to try the container method my favorite is Earthbox containers. The Earthbox website has tons of free information and a forum that will help you understand the concepts for just about any climate and types of plants as it pertains to using their planters. Check out their website at http://earthbox.com for more info. For the record they don’t pay me to talk about their products, I just love the results I get from my Earthboxes and want to share that with you. I used Earthboxes for four years now with great results, especially with tomatoes and okra.
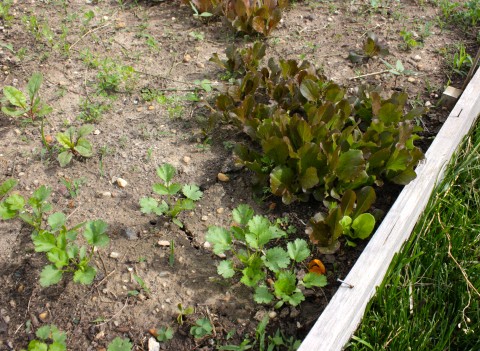
Cilantro, Petite Rouge lettuce
For most parts of the country it’s not too late to get something planted. This week I’m planting tomatoes that I started from seed. I’ll put some in my Earthboxes and some in the ground and see which ones do best. I never know until I grow them in both places to see which plant prefers real dirt to the Earthbox growing medium(soil). It’s also time to visit local nurseries and farmer’s markets for the other vegie plants I’ll buy and transplant to my garden. I usually buy some of my tomatoes, peppers, and okra this way to get a head start.
So give it a try and let me know if I can help you in anyway to get started or maintain your very own vegie garden. I think you will love it!
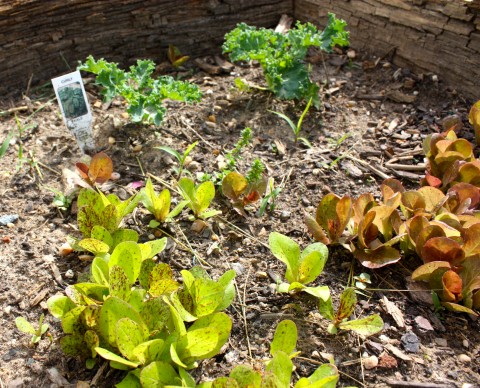
Kale and two types of heirloom lettuce
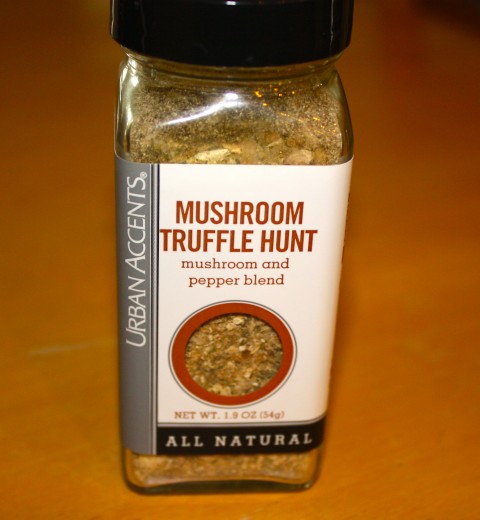
Here’s a recipe for a salad dressing that’s become one of my favorites. It calls for a special ingredient “Mushroom Truffle Hunt” by Urban Accents. This weeks give away will be a jar of Mushroom Truffle Hunt for three lucky winners who leave a comment on this post. Please enjoy this recipe of mine in either of it’s forms, Italian or Asian.
Mushroom Salad Dressing(Italian)
1 tablespoon Mushroom Truffle Hunt Blend
1 tablespoon red wine, or red wine vinegar, or white wine vinegar
4 tablespoons apple cider vinegar
1/4 teaspoon dried oregano
1/4 teaspoon dried basil
5 tablespoons olive oil
1 tablespoon finely grated parmigiano reggiano cheese
Soak Truffle Hunt blend in vinegar and red wine for 5 minutes.
Combine all ingredients and mix well by shaking in a jar or in a bowl with an immersion blender.
Enough for 6-8 salads.
Note:
Goes well on mixed baby greens or romaine lettuce.
Minced garlic or shallots(1 teaspoon) may be added for more zip!
Top each salad with 1 tablespoon feta cheese crumbles, and 2 teaspoons of toasted pine nuts for extra goodness.
For an Asian version omit oregano, basil and cheese. Use 3 tablespoons of olive oil and 4 tablespoons of sesame oil plus a tablespoon of soy sauce. Minced fresh ginger(1/2 teaspoon),and/or minced shallots(1/2 teaspoon) would work well too.
Even though Urban Accents has agreed to furnish me and the winners of the drawing their products for free my opinions are my own. The products I have tried from them over the years are very good and I can’t wait to try more.
Some Like It Hot!
My love affair with hot spicy foods began when I was a teenager eating chips and salsa in a real Mexican Restaurant in Alamosa, Colorado. I would dip the chip just enough to get a kick but not go to the painful levels of the Scoville scale. Heck, I hadn’t even heard of the Scoville scale invented by Wilbur Scoville to measure the hotness of peppers back in 1912 until I’d been eating hot peppers for 20 years or so. Over the years I kept upping the heat and trying new types of ethnic foods that incorporate peppers to expand my pepper experience.
Since then I have used the scale many times over the last 15 years to look up the heat ratings of my favorite peppers. It seems the more new and different hot pepper varieties I try, the more I love hot peppers. They taste great and contrary to public opinion they are good for you! I think I could devote a whole month to hot pepper folklore, recipes and new recipe research on my blog. The most important thing about cooking with, growing and eating hot peppers is they must taste good! I don’t care how hot it is if I don’t like the taste.
Why Habaneros?
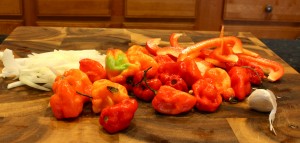
It’s kind of funny that I would plant habaneros in my first garden project here in our backyard in Baltimore, Maryland since I had not really liked them much up to that point in my life. I thought I would plant them and see what might happen when I saw a six-pack of small plants for $2.50, and was blessed with one crazy little bush out of that Habenero six-pack that gave me more than a hundred peppers! Not wanting to waste the beautiful peppers I set to work to find a way to eat them and made this delicious, but very hot homemade Habenero Salsa (http://www.fastandfuriouscook.com/habanero-salsa/).
You can cook down a whole bunch of Habeneros into a couple of half-pint jars and store them for a long time if you do the canning process correctly. After that first year’s success, I was hooked on growing and eating Habeneros and bought a few Caribbean Red Habaneros to plant as well as the yellow variety. They did ok in the garden and I used them for many a stir fry and also made hot sauce from them. What an amazing flavor they have. They aren’t quite as pungent as a regular yellow Habenero, and not scorching hot like a Ghost Pepper. Red Habaneros have an exotic flavor that conjures up visions of hanging out under an umbrella, stretched out on a lounge chair, at a Caribbean beach with a cold beer and a nice breeze.
How Hot Can You Stand It?
For most people one or two drops of my red salsa on a tortilla chip is enough and gives a flavor explosion as well as raise the internal temperature of the mouth. Last year when my in-laws and my nephew were visiting for Thanksgiving I held a taste test with three kinds of salsas I had made from the summer’s pepper crop. Everyone picked the Caribbean Red as there favorite. It’s not super hot, only 120,000 to 400,000 on the Scoville Scale, and goes well with many different types of food.

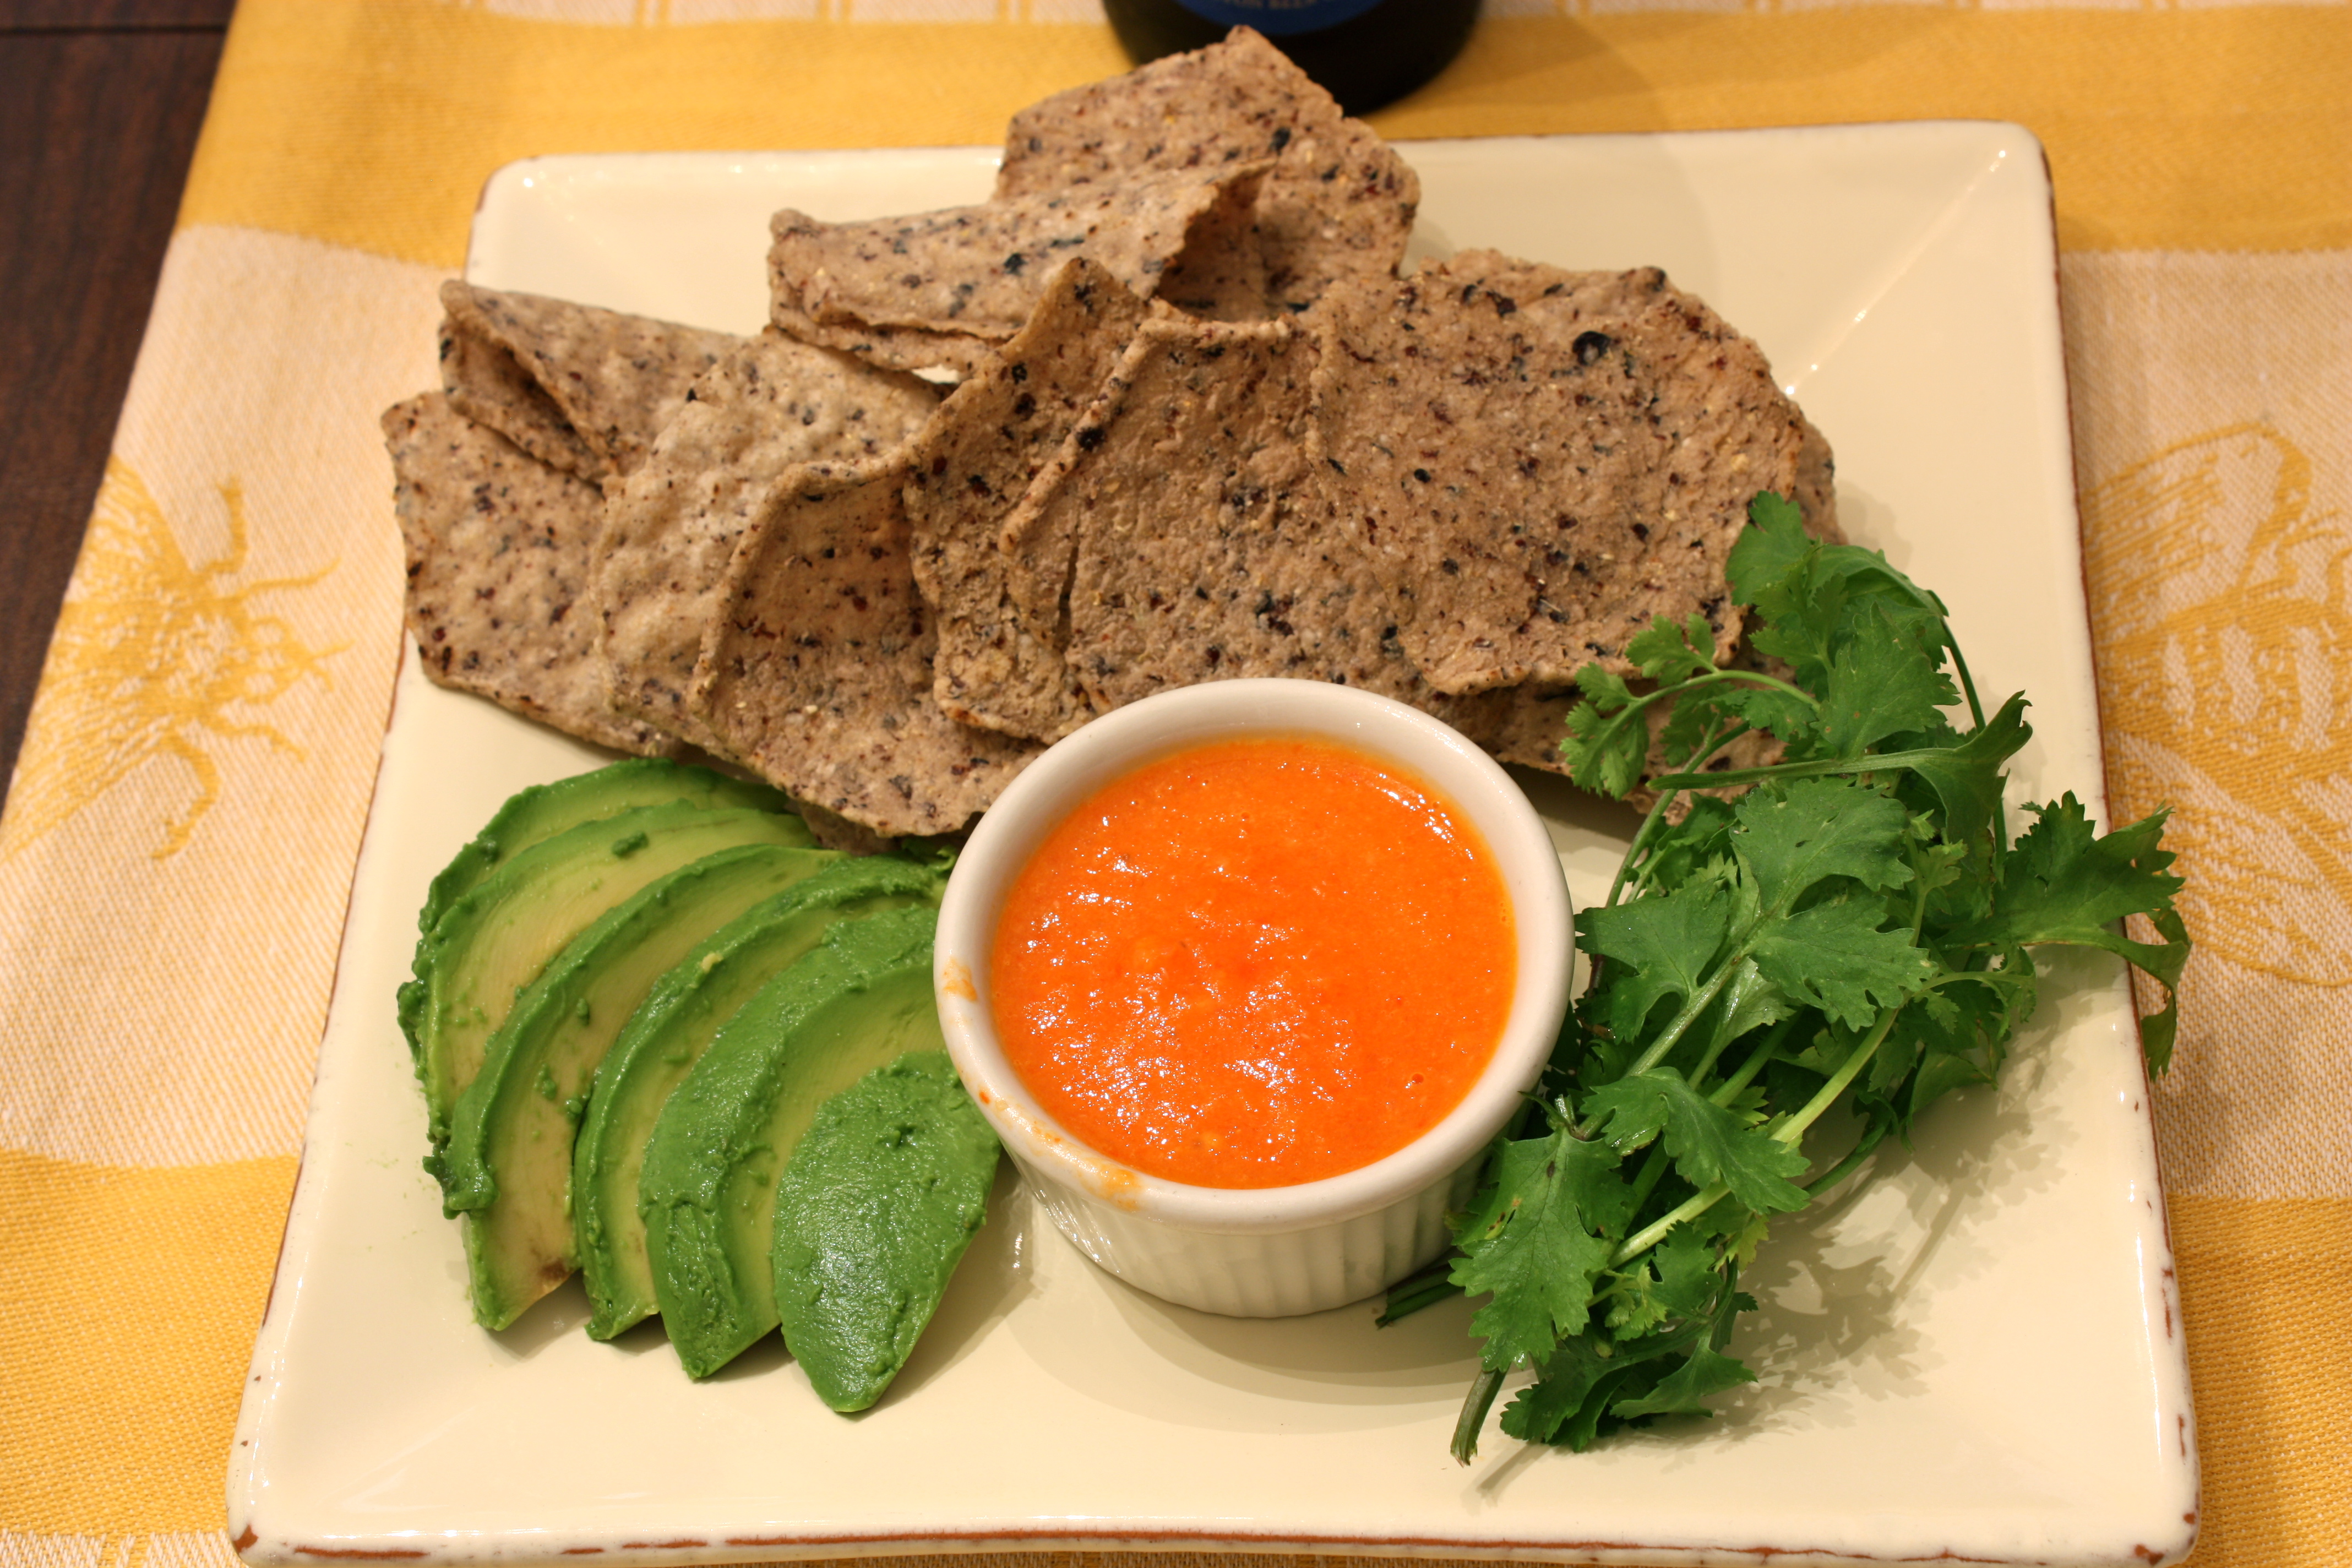
Chips and habanero dip.
You can put it in a meat marinade, stir fry recipe, salad dressing, tomato salsa, or put one in a jar of pickles. Next time you are in your favorite grocery store ask if they carry Red Habaneros. I was surprised to find them in two different grocery stores in my area recently, and of course, I had to buy them. I had just run out of my homemade red salsa from last year and needed to make a new batch. Today was the day and I’m happy to say it came out good and hot. Just remember to handle with care as they are hot! I use plastic food handler’s gloves or even dishwashing gloves when I prep these little firebombs.
Red Habanero Salsa
1 1/4 cup Red Habaneros sliced thin
1 cup yellow onion sliced thin
1 cup red bell pepper sliced thin
1 clove garlic minced, about 1 teaspoon
1 tablespoon olive oil
1/2 teaspoon salt
Water to cover
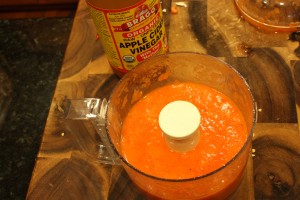
2-4 tablespoons Bragg’s or Spectrum Apple Cider Vinegar
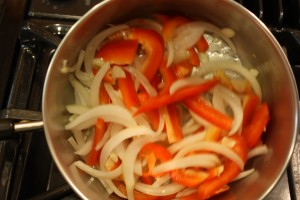
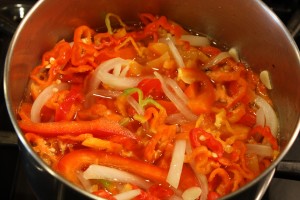
In a 1 1/2 quart pot saute the onions, bell peppers and garlic for 3-5 minutes on medium heat stirring often. Once the onions, bell peppers and garlic are softened add the habaneros and water to cover. Cook on medium-low to medium maintaining a simmer for 20-25 minutes stirring about every 5 minutes until all but about a half cup of the water is cooked off. Cool for 5 minutes and blend well in a food processor adding vinegar until desired twang id achieved. I like the lesser amount of vinegar, but if you want a Tabasco sauce like twang you will probably want to use the larger amount of vinegar. I have kept this type of sauce fresh in my refrigerator for up to 6 months. It lasts a long time as a little goes a long way. Be sure and gift some to your friends and family who like it hot!
Note:
You can drain off most of the liquid after cooking/cooling before blending and add it back bit by bit to get your desired consistency.
Yellow habaneros work just as well but have a slightly different flavor.